
Setting Up A VPN Server On Windows 10 In 8 Steps

- Introduction
- Creating the server
- 8 Steps To Setup A VPN Server On Windows 10
- Step 1 – open “network connections”
- Step 2 - select “new incoming connection”
- Step 3 - select user accounts
- Step 4 - tick the “through the internet” box
- Step 5 - select networking protocols
- Step 6 – allow access
- Step 7 - windows will now configure access
- Step 8 - the VPN server on your system is now active
- Windows / iPhone / Android: how to connect to Windows VPN?
- Windows: find my local IP address
- Windows / Iphone / Android: connect to Windows VPN
- Why Create A VPN Server On Windows 10?
- What are the best VPN to create a VPN server on Windows 10?
- Best provider to create a Windows 10 VPN server
- Frequently Asked Questions
- Comments (3)
Introduction
VPN is a virtual private network. It is an encrypted tunnel between two devices, allowing you to access any website and online service privately and securely.Windows has a significant advantage - you can create your own VPN server to access shared folders or other applications over the Internet on the go. Windows really can do it. But there are a few rules to configure VPN Server Windows 10 and get started.
It can be useful to create a VPN server if you want to connect to a home network, if you want to play LAN games, or if you want to secure your web browser on public cafe wi-fi. These are some of the countless reasons why you should consider using a VPN. Windows has the potential to host VPN servers. Windows does this by using a point-to-point tunneling protocol, PPTP for short. We will show you how to find it on your computer and create the VPN server. If you are using windows 7, 8, or 10 then you do not need to worry, the steps that we are going to show you for setting up VPN server on windows 10 will work for all of them.
What is a Windows VPN server? A Windows VPN server will allow other devices on your LAN to connect securely through the Windows VPN connection
By setting up a Windows VPN server on that machine, the other devices connected to the LAN will be able to use the Internet connection secured and encrypted without the need to have themselves a VPN connection and account.
Creating the server
You don't need to worry if you have never done anything like this on your computer before. We will break down the process into steps so that it is easier to understand.
8 Steps To Setup A VPN Server On Windows 10
- Step 1 – open “network connections”
- Step 2 - select “new incoming connection”
- Step 3 - select user accounts
- Step 4 - tick the “through the internet” box
- Step 5 - select networking protocols
- Step 6 – allow access
- Step 7 - windows will now configure access
- Step 8 - the VPN server on your system is now active
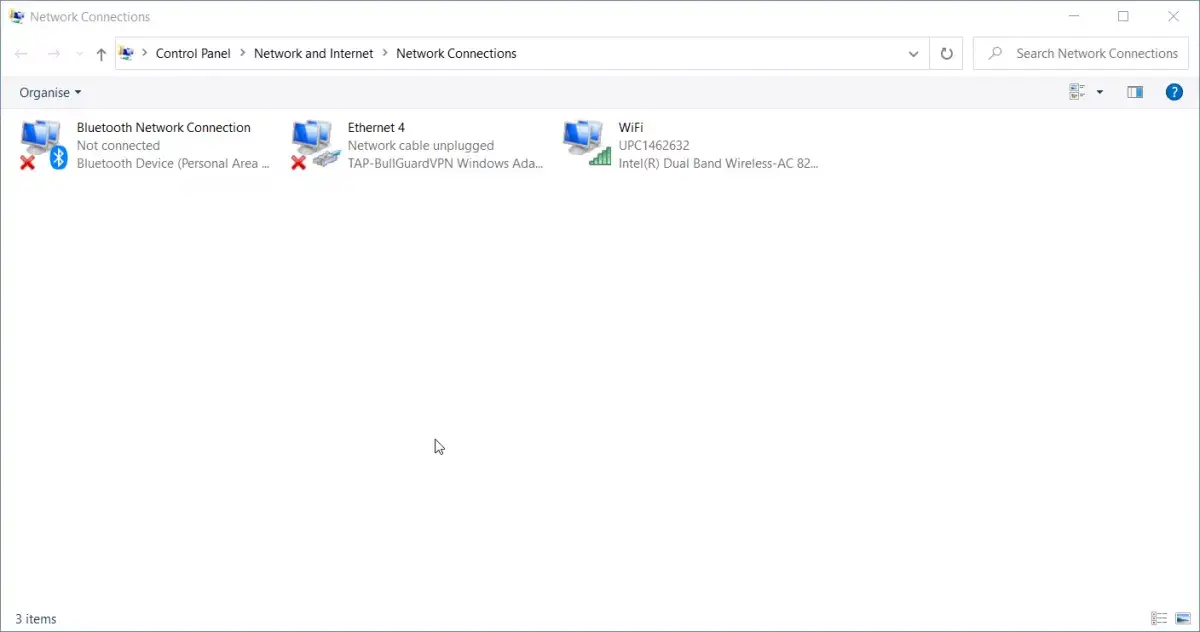
Step 1 – open “network connections”
First you must open “network connections”, this is a window, click on the start windows icon in the bottom left corner of the screen and type these letters “ncpa.cpl”. Press enter.
Step 2 - select “new incoming connection”
Once you have opened “network connections” press alt on the keyboard. This will show a full menu. Now click on the “file” menu. Now select “new incoming connection”.

Step 3 - select user accounts
Now select user accounts, the ones which could connect remotely. If you want you can level up your security, you can go ahead and create your new account. This will not allow users that log onto your VPN to log on from a primary account. You can easily do that just by clicking a button that says, “add someone”. Remember that whatever you may choose you need to ensure the account that you select has a tough password. We don’t want people hacking our system. After you select your user click “next”.
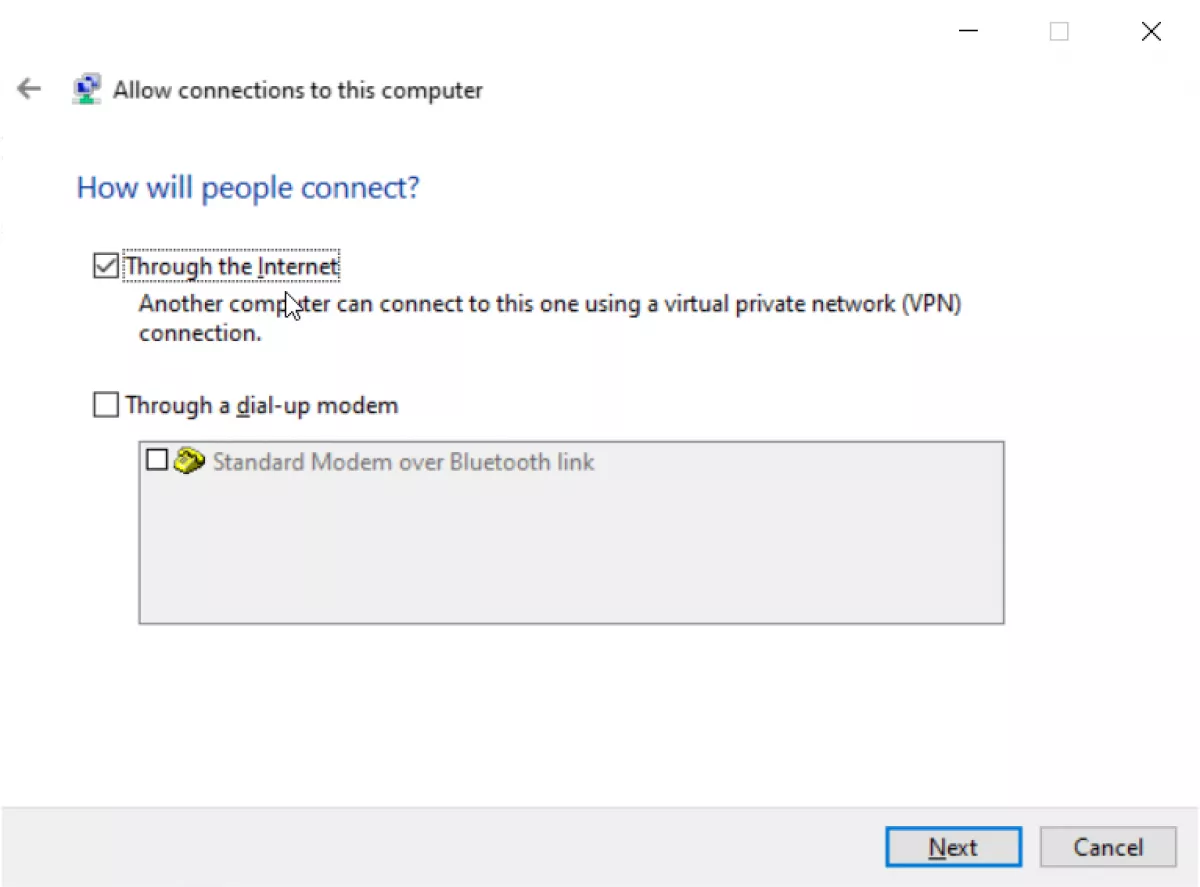
Step 4 - tick the “through the internet” box
Tick the “through the internet” box. This will allow VPN connections to establish. There will be nothing else on this window other than this option. Now click “next”. If you have dial-up hardware installed, then you can also allow any incoming connection through the old dial-up modem.
Step 5 - select networking protocols
Go ahead and select networking protocols which need to be active for any incoming connections. If you don't want a user connected to your VPN to have permission to access printers or files on the local network, then just untick the option and you are all good to go.
Step 6 – allow access
Next, click on the button that says, “allow access”.
Step 7 - windows will now configure access
Windows will now configure access for user accounts that you choose earlier. This process may take up to a couple of seconds.
Step 8 - the VPN server on your system is now active
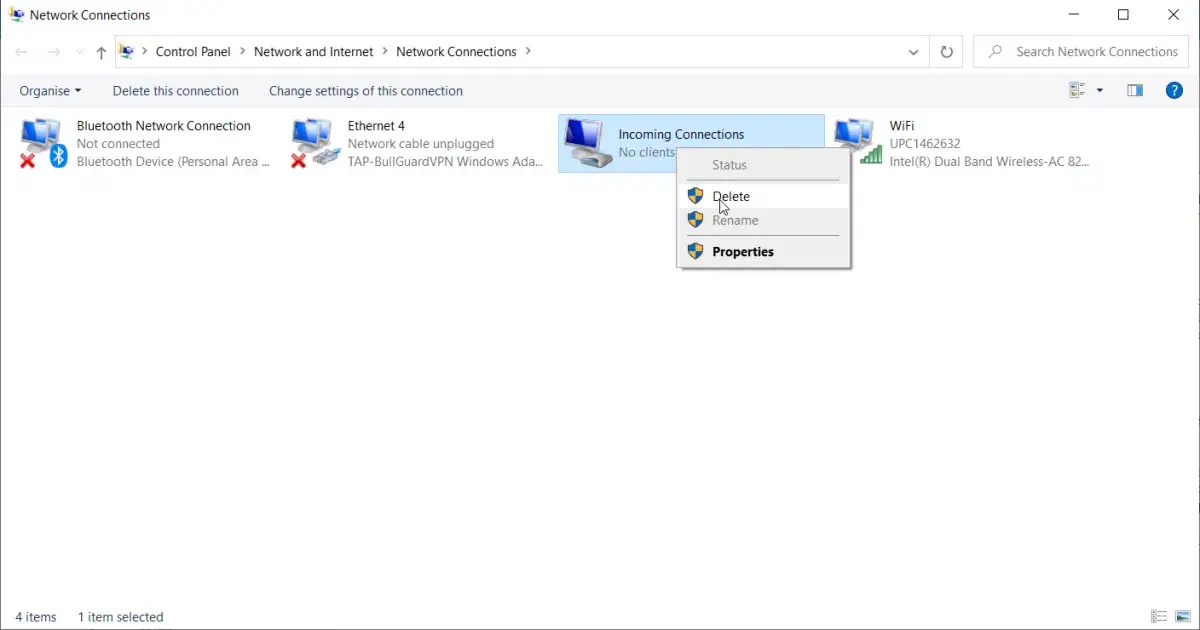
The VPN server on your system is now active. It is enabled to take any requests for incoming connections. If in the future you wish to disable this VPN server just go back to the “network connections”.
If you are unsure how to get there simply repeat step 1 of the setting up VPN server on windows 10 steps - once you are in the window just delete “incoming connections” section.
Windows / iPhone / Android: how to connect to Windows VPN?
Once your own server has been created on your local Windows10 installation, you can easily connect any device located on the same local area network – meaning in most cases, on the same WiFi connection, by simply checking your Windows server local IP address, and using that address to create a new VPN connection on your Windows computer or other Android device.
However, to connect to your Windows10 VPN from outside of your LAN, a more advanced configuration is required, and you must know your public IP.
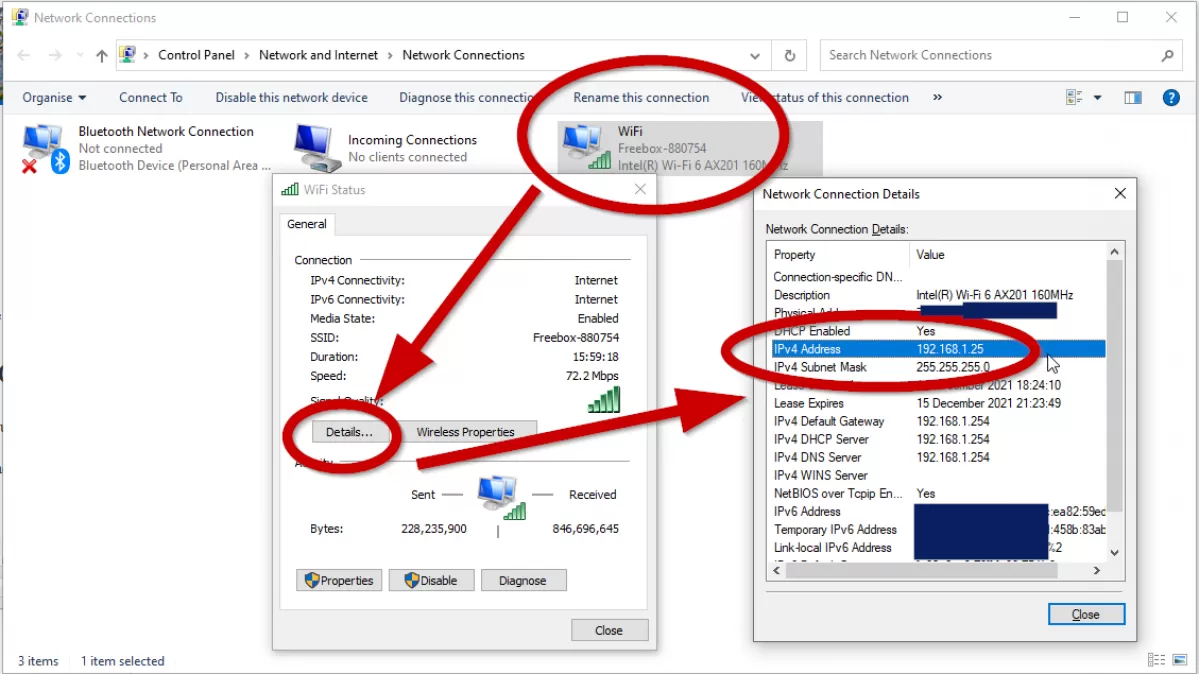
Windows: find my local IP address
To find the IP address of your local Windows VPN server, simply open the “Network connections” menu, and from there, open the WiFi connection details.
Inside the WiFi status window, open the details from the corresponding Details button, and simply find the IPV4 address – this is your local VPN server address.
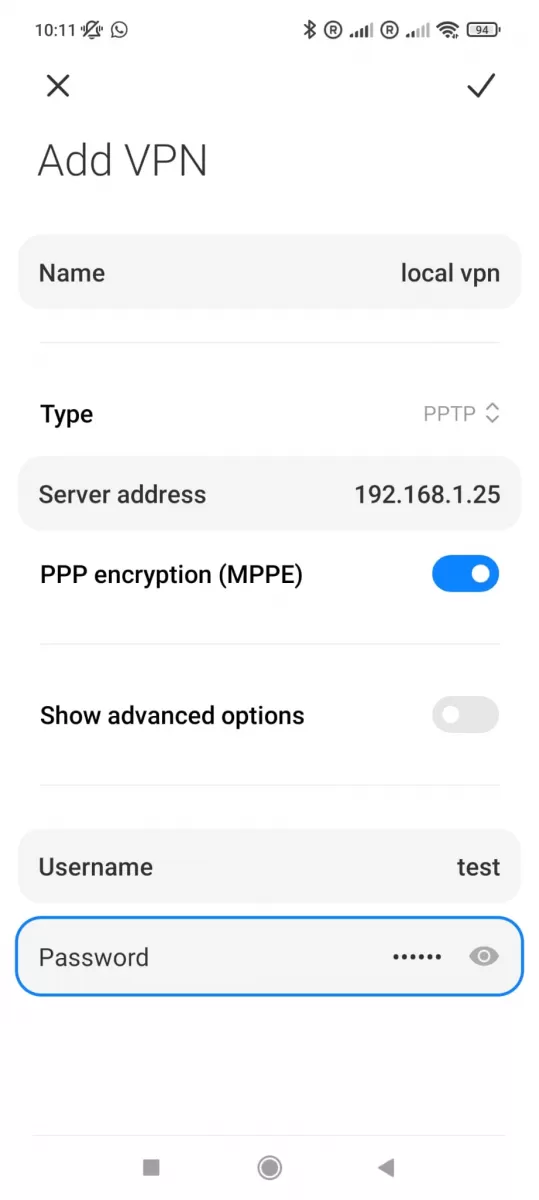
Windows / Iphone / Android: connect to Windows VPN
Then, on your Android device, simply create a new VPN connection, by using the corresponding option, usually located in the menu VPN under settings.
From there, add a new VPN server, and enter your Windows10 local IP address as the VPN server address, give the connection a name, and enter your username and password. And voila, that should be it!
Why Create A VPN Server On Windows 10?
The steps leading to create a VPN server on Windows 10 are pretty easy to follow if you are willing to configure your local computer installation in order to secure connections of other computers that are on the same local area network (LAN) as your laptop.
Make sure that the other computers or devices that are meant to secure their Internet connections are connecting to the World Wide Web through your computer, and not directly to thee connection. Otherwise, each individual device might need a VPN connection, which you can also get from any provider and will get an individual IP address secured for the device, that will be different per device if they are using various servers.
Therefore, by creating a VPN server on Windows 10 on the computer that has the main access to Internet, you can use that Windows 10 VPN server to secure all other devices connection, as long as they are located on the same LAN network.
What are the best VPN to create a VPN server on Windows 10?
Create VPN server Windows 10 using the Best VPN available on the market for your usage, which should generally be an unlimited, unmettered, and no logs VPN, on top of offering of course the Best VPN monthly deal that will get you a secure connection for the lowest price.
Best provider to create a Windows 10 VPN server
- PlanetFreeVPN, Cheapest VPN for one month or 3 years subscription
- Ivacy VPN, Cheapest VPN for one year subscription
- SurfShark VPN, Cheapest VPN for 2 years subscription

Frequently Asked Questions
- Is it possible to set up a VPN server on Windows 10?
- Yes, you can create and set up your own VPN server to access shared folders or other applications over the Internet, wherever you are.