
How To Use Font Awesome In Documents?

- What Is Font Awesome?
- How To Use Font Awesome In Windows?
- How to use Font Awesome in Microsoft Word?
- How to use Font Awesome in Microsoft Excel?
- How to use Font Awesome in Microsoft Powerpoint?
- How To Use Font Awesome in GIMP?
- How to include Font Awesome icons in Libre Office?
- Using the Font Awesome on your computer in short
- Frequently Asked Questions
What Is Font Awesome?
Font Awesome icons is an amazing set of various icons sets, some of them free to use for any usage, and some of them accessible only with a paid subscription.
The free sets consists of standard solid fonts, called the FAS set for Font Awesome Standard icons, that has a whole range of scalable drawings that will be perfect to illustrate any document you are creating, from a website to a professional looking CV for your digital nomad job search - or even to include in your freelance writing or other freelance gigs deliverables.
The standard business fonts, called the FAB set for Font Awesome Business icons that contains brands logos for use in your documents, such as the Google Docs icons or the Office 365 and Microsoft Office icons for their products Microsoft Excel - Microsoft Word - Microsoft Outlook - Microsoft Powerpoint - and many more!
But, how to use that font in other applications than the standard Web design tasks? Find it out below - it all start with downloading the Font Awesome icons sets locally on your computer before being able to use them in other applications such as GIMP image manipulation program, and virtually any software that allows for font switch.
How To Use Font Awesome In Windows?
The first step after having downloaded Font Awesome icon set locally on your computer, is to unzip the package, and navigate at the root folder.
There, you will find a TrueType Font file called fontawesome-webfont.ttf - double click on that file to open it in the Windows font management software.
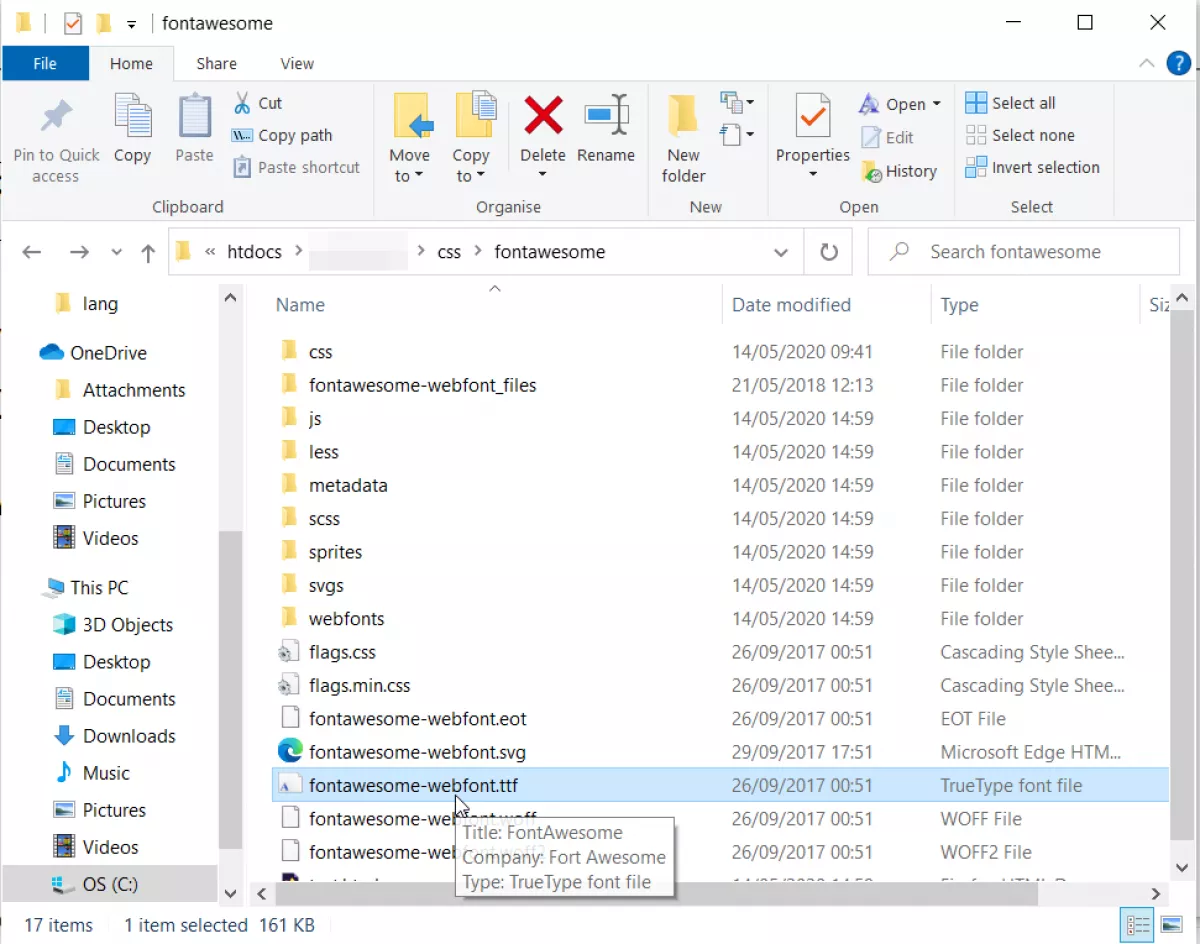
Then, click on the install button on top of the window, and that's it - the whole font awesome icon set is now installed on your computer, even if it doesn't look like, and if you haven't seem any special character yet.
The Font Awesome icons set installation procedure works the same on Mac computers!

How to use Font Awesome in Microsoft Word?
After having installed the icon set on your computer, open your Microsoft Word document and put the mouse pointed where you want to insert the Font Awesome icon.
In the menu Insert, find the Symbol option, which will open the symbol browser.
Select the FontAwesome option in the system fonts list, and browse the symbols until you find the one you want to include in your document. Double click on the icon, and it will be included in your document, you can then style it as any other character.
The added FontAwesome characters will be part of the overall character count of the document, which you can verify using a word counter tool online.
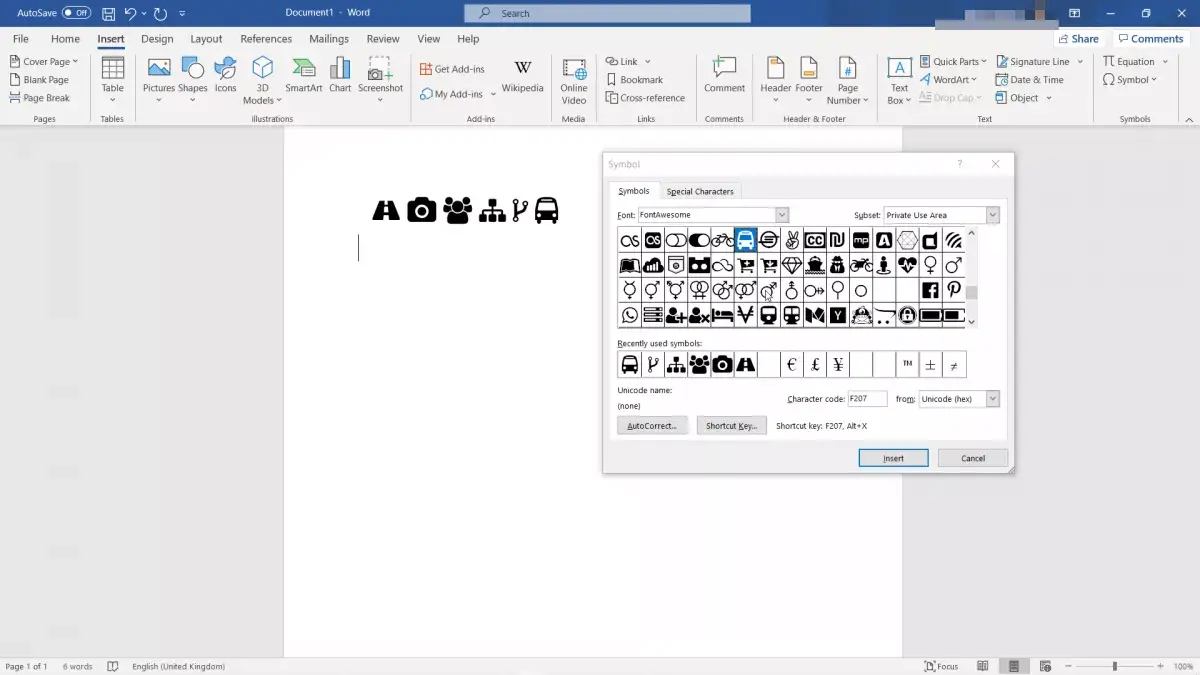
If you cannot find the icon within the list, another option is to find the Font Awesome icons character code from the list, and enter it in the symbol brower's character code field, which will directly find the exact icon from the list.
How to use Font Awesome in Microsoft Excel?
The same way that you have added icons in Word, you can add a Font Awesome icon in any Excel workbook by selecting the cell in which you want to add these symbols, and open the symbols browser from the insert menu, and symbol button.
The symbol browser will open, in which you can select the Font Awesome icon set and browse the symbols until you find the right one.
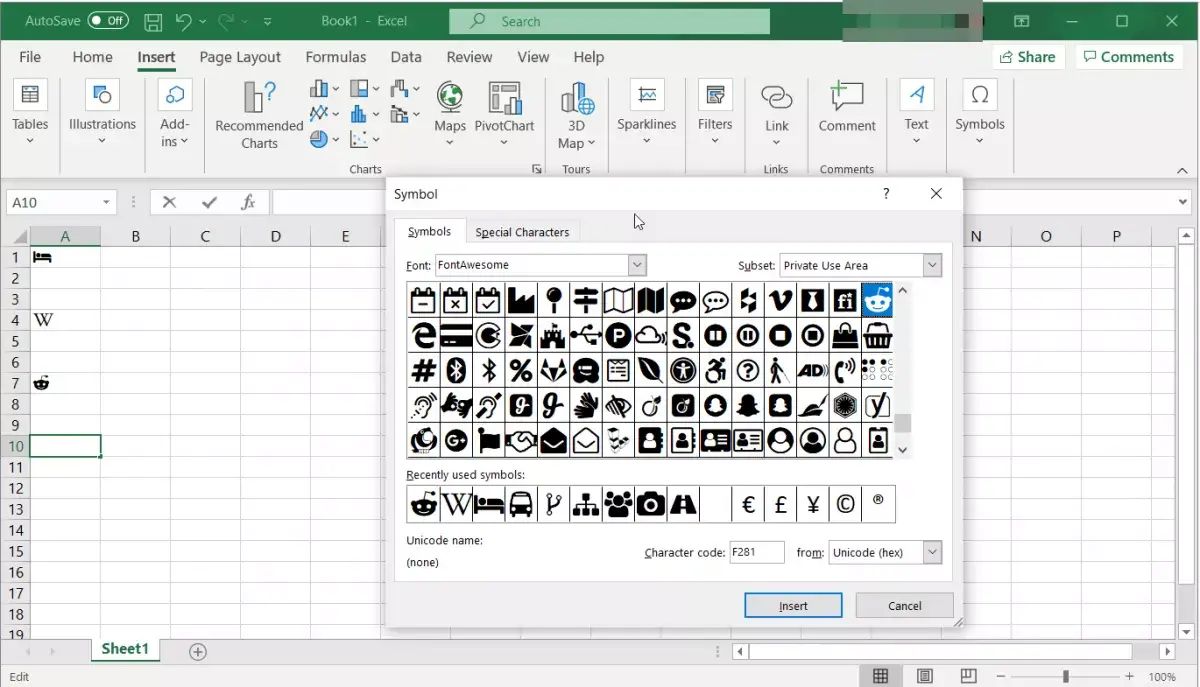
As it might be difficult to find the right icon from that list with small characters, another way to get the right icon is to browse a more visually accessible list such as the Font Awesome icons display, copy the unicode name of the symbol you want to include, and paste it in Excel's symbol browser character code field - it will directly insert the right symbol in your document.
How to use Font Awesome in Microsoft Powerpoint?
Inserting Font Awesome symbols in any Microsoft Powerpoint presentation to make it look even better is as easy as a few clicks!
After having installed the icons set, open a Microsoft Powerpoint document and put the mouse pointer in a text entry field at the place where you want to insert an icon.
Then, select the Insert menu, and click on the symbol button. From there, you will be able to select the icons to include form the symbols browser window that shows up.

As it might be complicated to find the icon simply from the visual list that might appear small, another option is to search by text description or to browse larger icons display on the Font Awesome icons list in which the symbols codes are accessible. Copy the code, and paste it in Powerpoint's character code box to include the icon in your presentation.
How To Use Font Awesome in GIMP?
Unfortunately, there is no simple way to browse the Font Awesome icons list from the GIMP application. However, after the icons have been installed on your computer, you can include the ones you need in your favorite editor, such as any of the Microsoft Office or Libre Office and Open Office programs, find the icons you want, include them in a document, copy them, and paste them in GIMP program, either alone, in which case it will become a pixelated picture included in current layer, or in a text box, in which case you will interact with them as you would with any characters from any font.
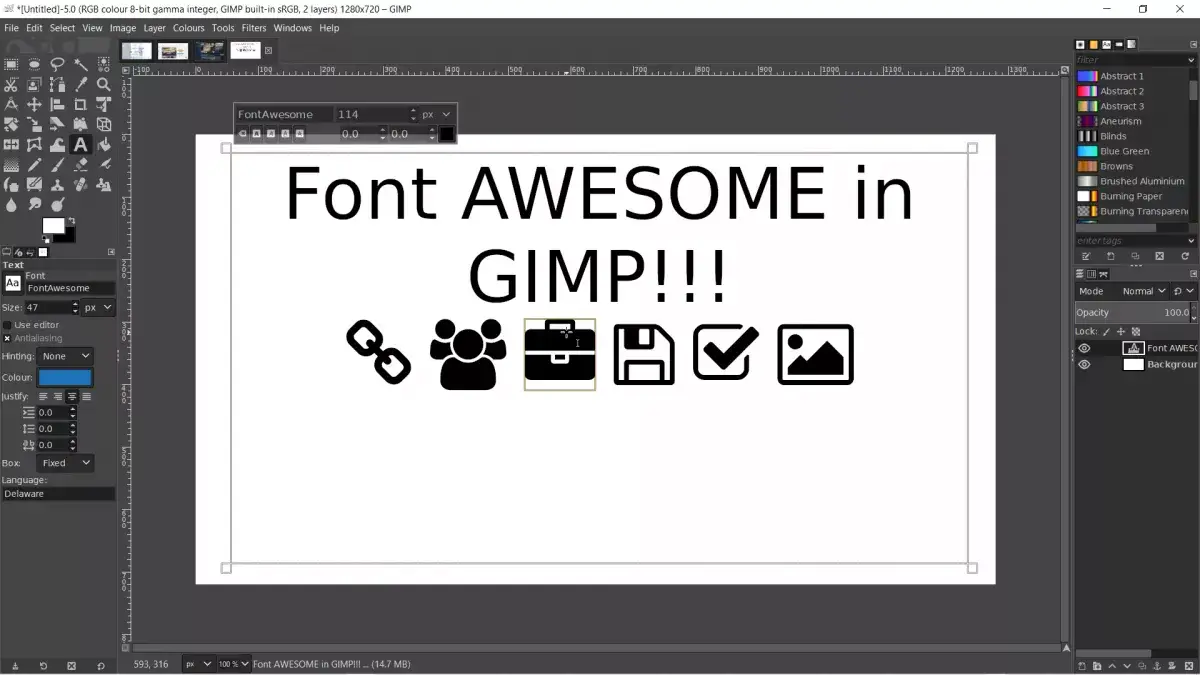
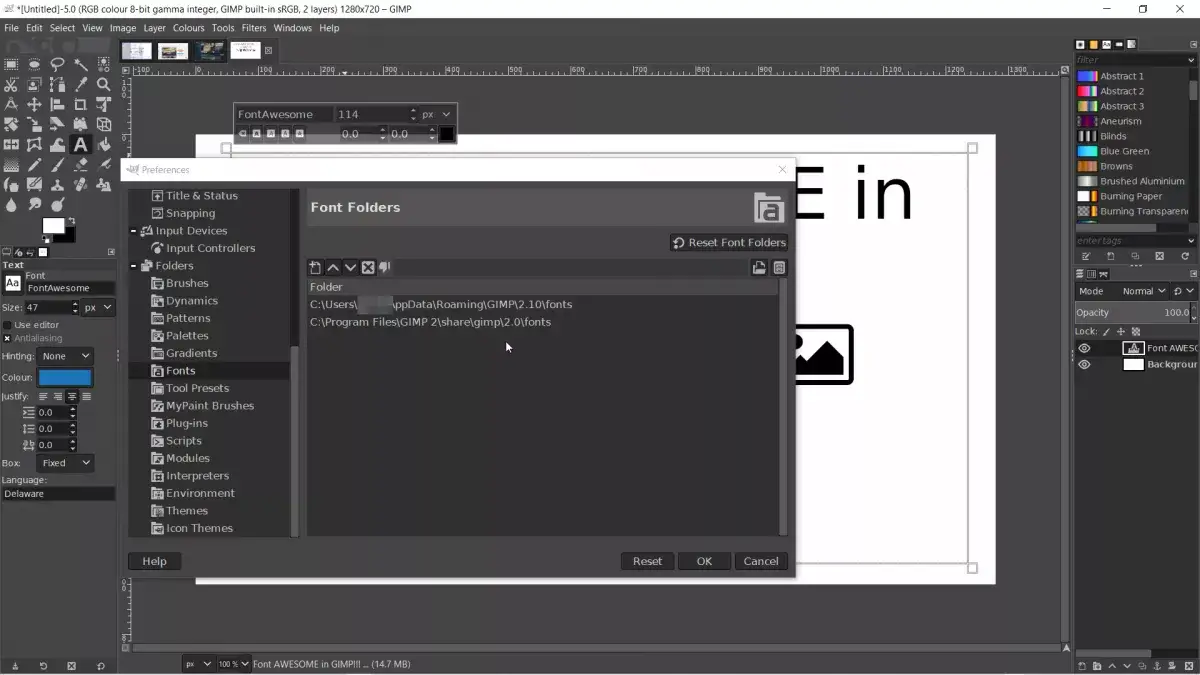
Another solution is to install the icon set directly in the GIMP program, by going in the preferences menu from the edition main menu, and checking the fonts folders available on your computer.
Then, simply copy and paste the TrueType font file fontawesome-webfont.ttf and paste it in one of these folders. Then, restart your GIMP program in order to access the Font.
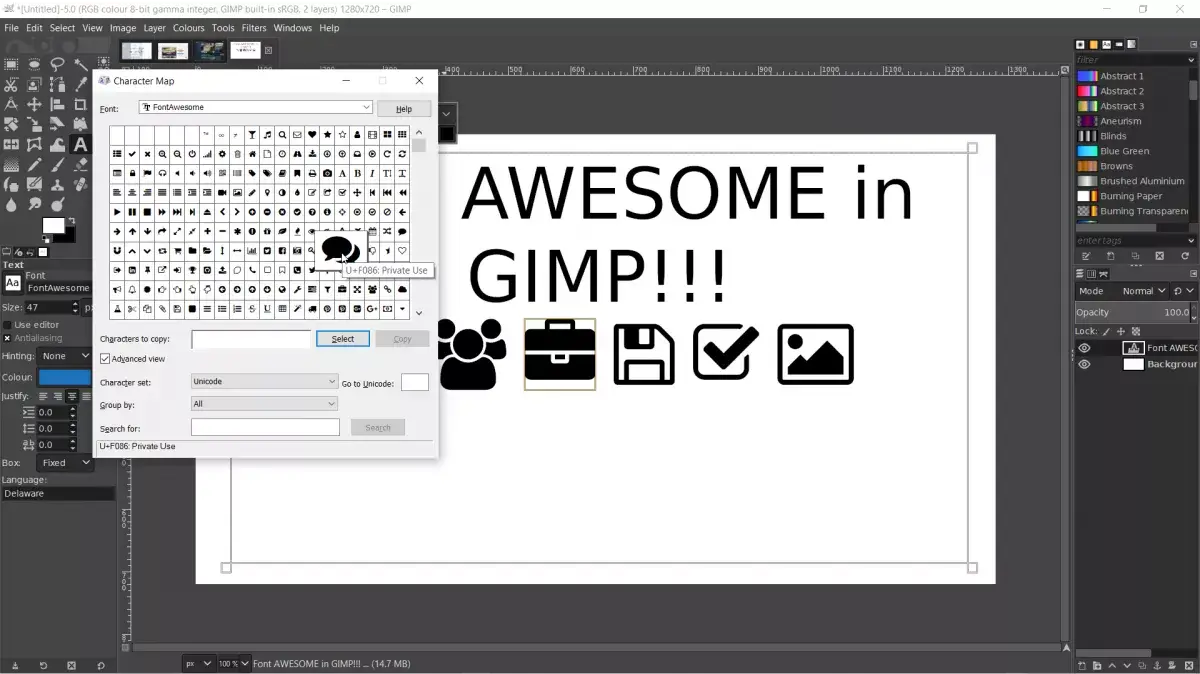
You will then be able to access the font directly from GIMP - however, the easiest way to include Font Awesome symbols will be to use the system font Character Map that you can find in Windows main search, select the FontAwesome font, and browse for the icons you want to include in your GIMP creation, and then copy and paste them there.
In you have trouble accessing the icons you want to include, simply look for them via tags or large icons browsing on the Font Awesome icons detailed list, copy the hexadecimal 4 characters code, and paste it in the go to unicode field in the Character Map to find it directly, and be able to copy and paste it.
How to include Font Awesome icons in Libre Office?
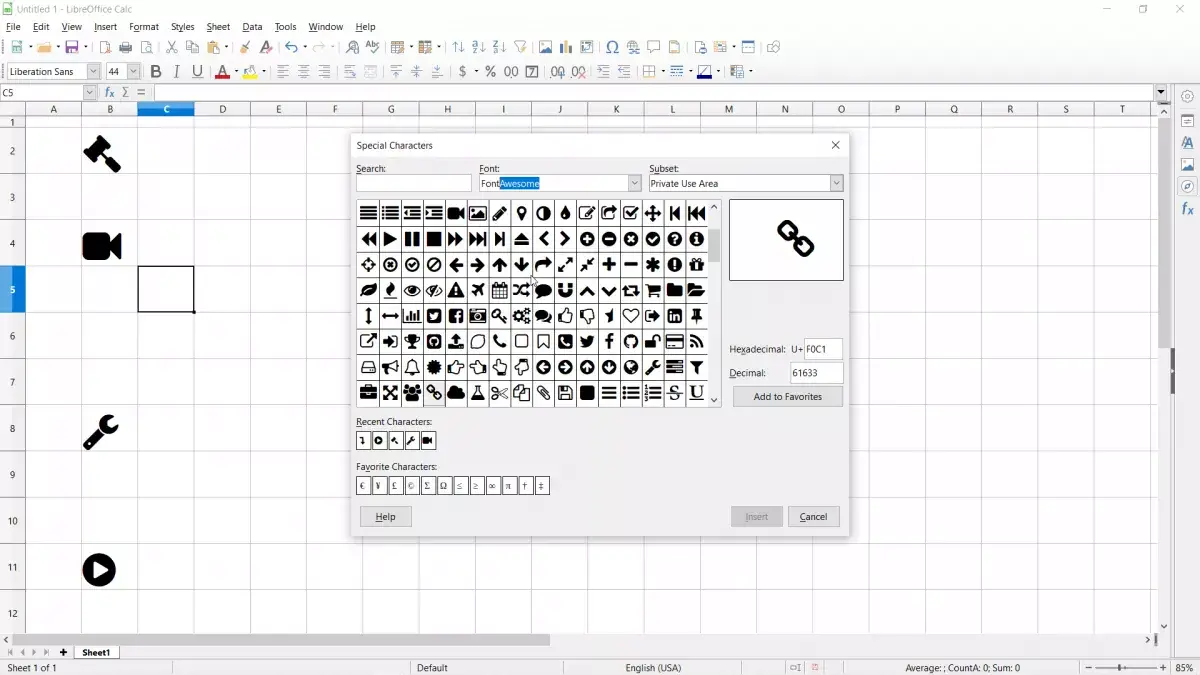
As soon as the Font Awesome has been installed on your computer, you can include any of its symbols in a Libre Office document by opening the Insert menu and then the special character option, that will open a specific characters search window.
Select the Font Awesome from the fonts list, and the symbols will be displayed right away.
Simply find the ones to insert in current document, and double click on it to include it!
Using the Font Awesome on your computer in short
It it fairly simply to have the Font Awesome icon set for all your digital creations and to make amazing deliverables for your freelance writing or other digital nomad job's documents.
All you have to do, is to install the font on your computer, and search for the icons from a symbols list program or the icons set list.
Frequently Asked Questions
- How to use Font Awesome Excel?
- You can add a Font Awesome icon to any Excel workbook by selecting the cell where you want to add these symbols and open the symbol browser from the insert menu and click the symbol button.
Michel Pinson is a Travel enthusiast and Content Creator. Merging passion for education and exploration, he iscommitted to sharing knowledge and inspiring others through captivating educational content. Bringing the world closer together by empowering individuals with global expertise and a sense of wanderlust.