How To Set Up A VPN On Windows 10
Introduction to VPNs:

VPNs (stands for virtual private network) is a software that you can acquire to have a more safe internet experience. It helps its user by securing their network, prevent hackers, shield your searches, among other things. VPNs also help with things like watching netflix or hulu, protects you from dangerous websites, hides your location, etc. When getting a VPN, you can get it for multiple devices like computers (windows or mac), phones (android or iphone), or your ipad.
The best VPNs you can get are:
- PlanetFreeVPN: the best VPN monthly deal with cheapest 3 year subscription
- ITOP VPN: Unlimited bandwith and free offer
- Nord VPN: the most famous VPN brand
- Pure VPN: more than 6500 servers
- Ivacy VPN: cheapest yearly subscription
- OVPN: verified focus on privacy
- ExpressVPN: often rated as the most secure
- Tunnelbear: 500MB free monthly data
But remember - VPN do not protect privacy, provide additional security and anonymity. When an application is activated, the VPN server sees all network traffic - the risks remain, but are transferred to the owner of the service or application.
For Windows 10 VPN needs to be configured specifically. It is necessary to enter correctly all the parameters in the settings.
Here we will be going over how to connect your VPN to your device, specifically on windows 10.
How to set up a VPN on windows 10:
Once you get a VPN on one of the three softwares mentioned above, you now need to know how to connect your new VPN to your device. For windows 10, follow these steps:
Before connecting your VPN:
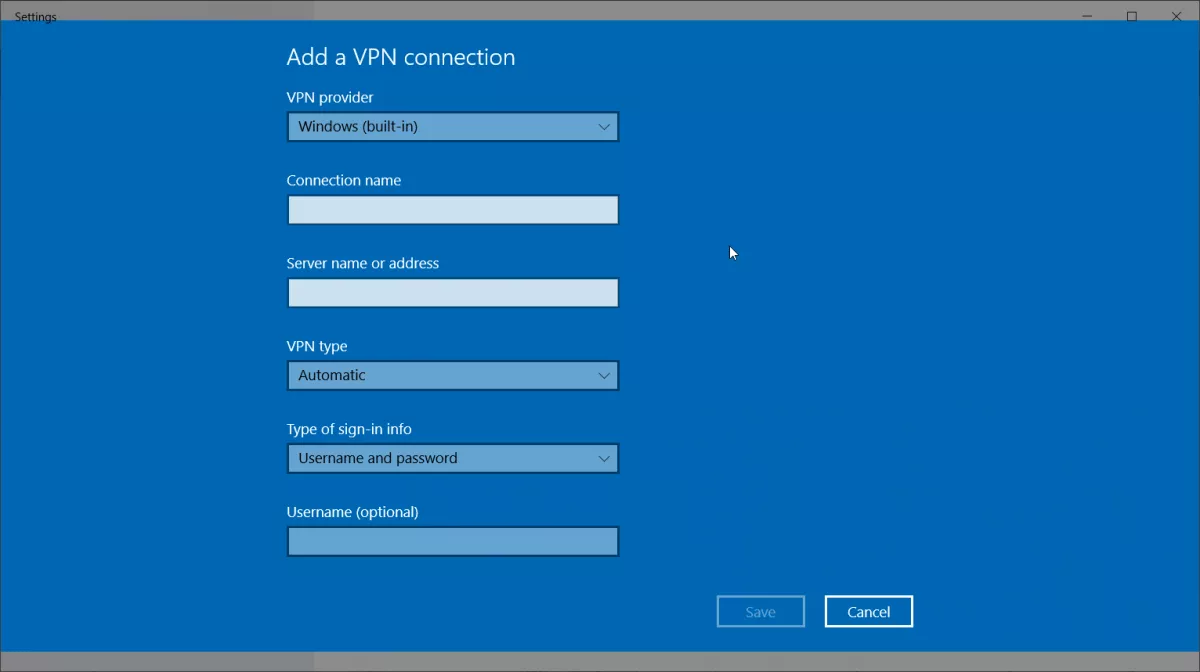
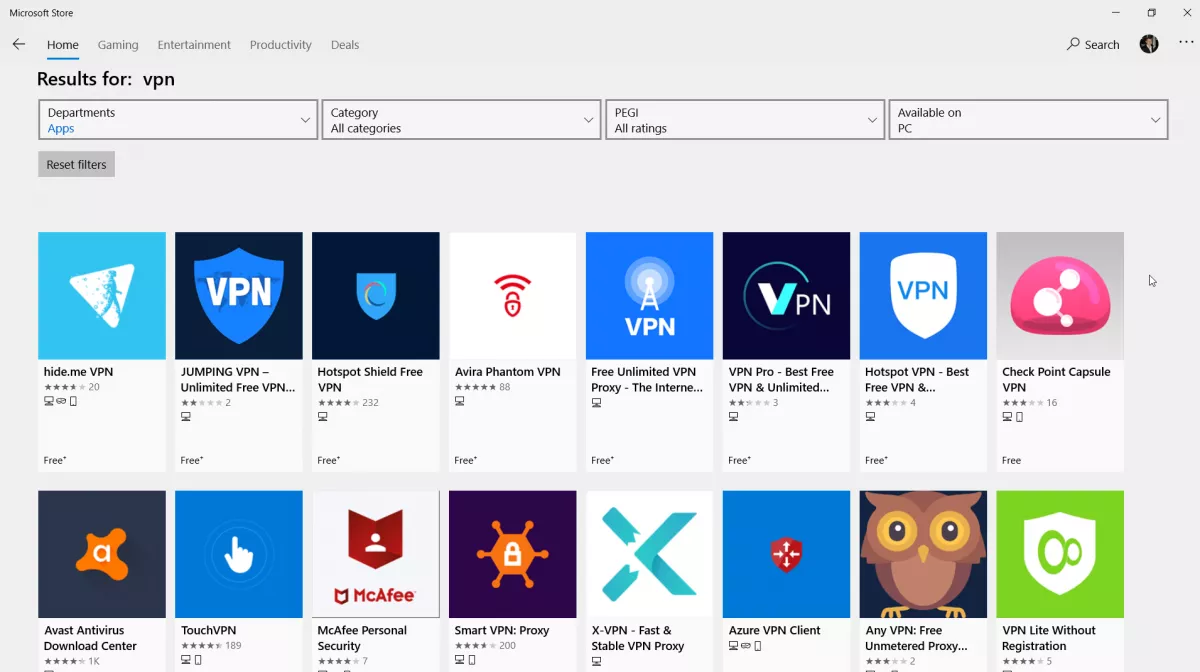
- 1. First, you want to create a VPN profile. To do this, you can do it manually by yourself or set up a work account from your company (if you are using the VPN for work). Then go to the microsoft store to see if you can find an app that will provide your VPN or go to the VPNs website to see VPN connections.
- 2. Once you do that, you need to add the VPN connection. Start with the VPN provider, you will then choose windows (built-in). Then go to the connection name box. Go with a name that you will be familiar with. This name will help you with connecting the VPN. Now in the server name/address box, enter the address of the VPN. Next is to go to the VPN type, which is the type of connection you want to make for your VPN. You need to know what service your VPN offers. Last is the sign-in info, where you will create a username, password, one-time password, etc.
- 3. Now save your info on your computer. If you want to do more advanced settings for the VPN, go onto advanced settings on your computer.
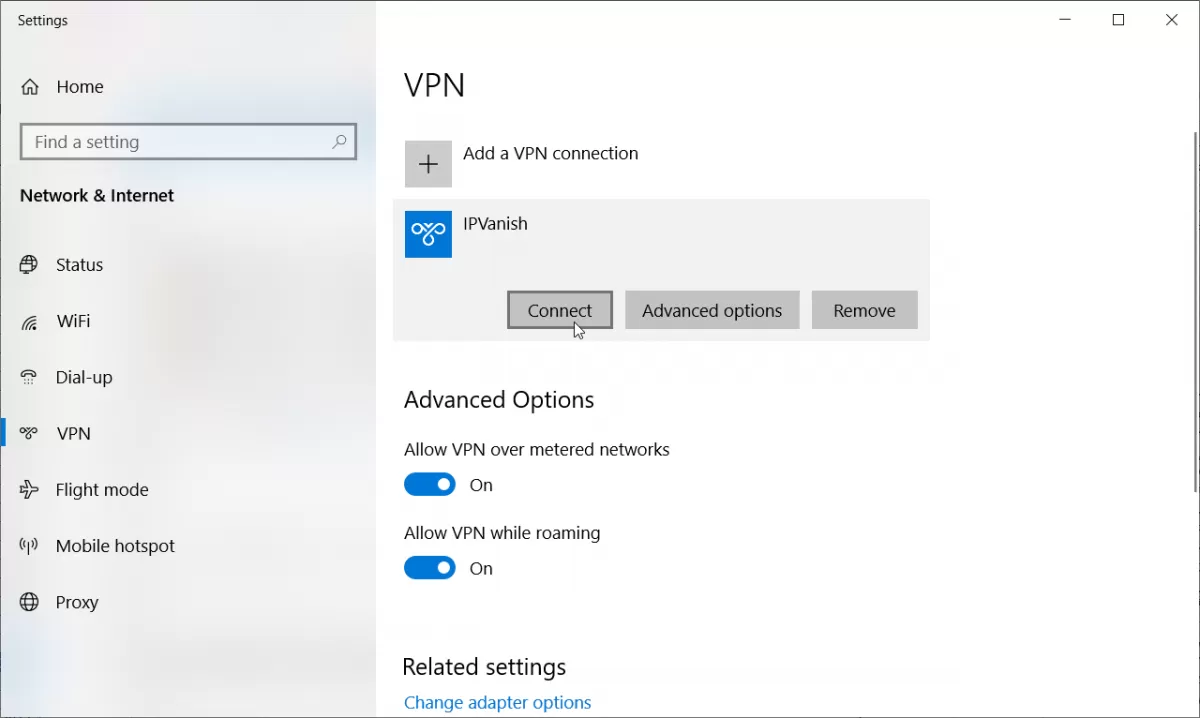
How to connect to the VPN:
Now that you got your account all set and ready, you can now connect your VPN! Here are the necessary steps to do this:
- 1. On your taskbar on the far right, you should see your internet icon. Click on the icon and pick what network you want to use your VPN on.
- 2. Once you select whatever network you want, the connect button will appear underneath the VPN connection or it will appear when the settings open where you can connect. After doing this, you will have to enter the username or password that you created when setting up your account.
- 3. To find out if you are connected to the VPN, the VPNs name should replace the network's name and say it is connected. Check it every so often to make sure the network is still connected with your VPN.
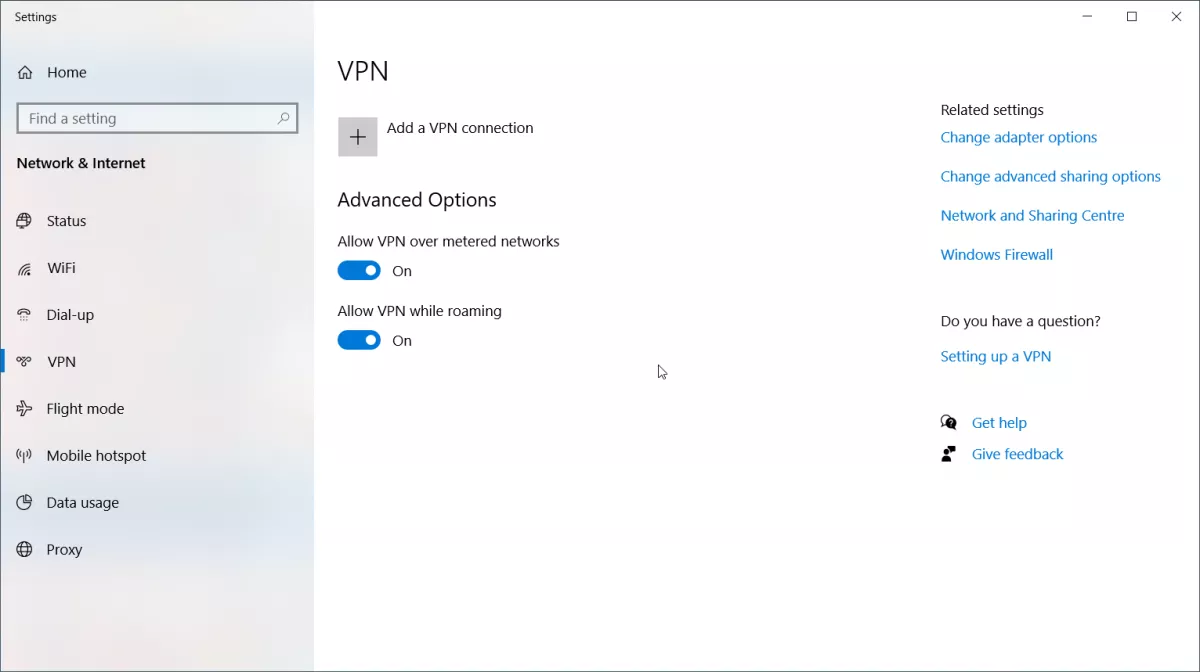
If a VPN has been installed on your computer, you will most likely find it in your Windows settings, from where you can directly connect to the VPN using Windows built-in connection options.